Preparing for YouTube Live (on the YouTube Website)
Note: These steps below are as of Mar. 2016, Cerevo cannot control any future YouTube website design changes.
- Login to YouTube, click your account pictogram on the top right of the screen and click the [Creator Studio] button.

- Click [LIVE STREAMING] from the left side of menus.

- If you haven’t created your own channel before, you will see this pop-up window, click [CREATE CHANNEL].

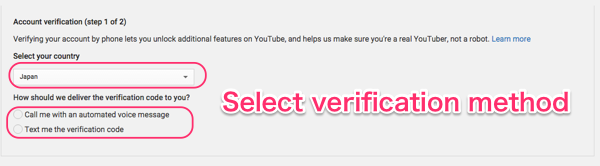
- The first time to create your own channel Google will request you verify your account with via Phone (SMS) authentication. Click [Get started] and follow the authentication steps.


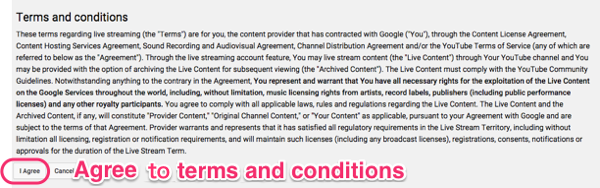
- Agree with the terms and conditions.
- Proceed to LiveWedge Dashboard setup.
Streaming Settings
Tap the [SETTINGS] button on the top right of the Dashboard main screen and you will see the [Streaming settings] menu.
Dashboard Setup
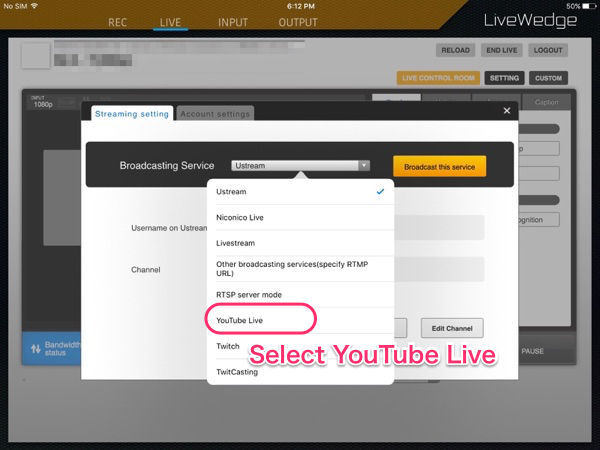
- Select [YouTube Live] from the [Broadcasting Service] dropdown menu.
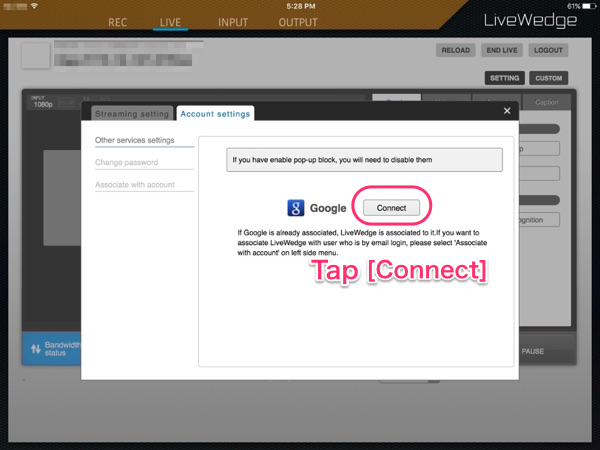
- If you didn’t associate your LiveWedge account with your Google account, you see account settings dialog window. Tap the [Connect] button and proceed to Google authentication, after that re-select [YouTube Live].
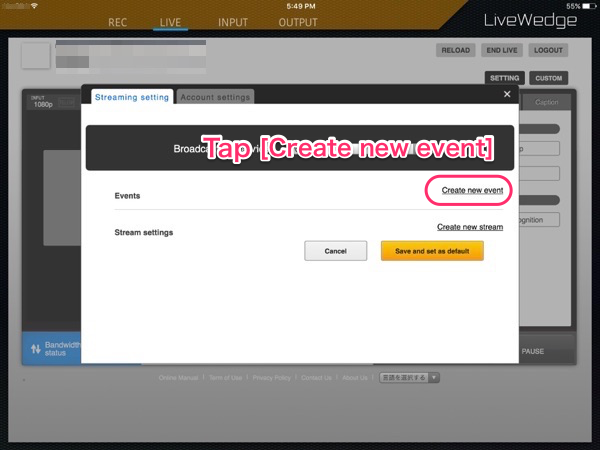
- Next, you will set the event schedule and stream resolution. Tap [Create new event] and enter the event information.
- You can set the below basic items from Dashboard, advanced settings can be set in the [Events] page (on YouTube).

- In Privacy settings section, you can set [Public], [Unlisted] and [Private].
- Public:
The streaming is public and anybody can search and watch. - Unlisted:
The streaming is public but not listed in search results or on your channel.So only those who know the broadcasting address can watch the stream. - Privete:
The streaming won’t appear on your channel or search results and will be invisible to other users.
- Public:
- DVR feature allows viewing audience to pause, rewind, and play from any point in the event up to 4 hours before the actual live streaming.If you would like to enable this feature, check [Enable DVR].
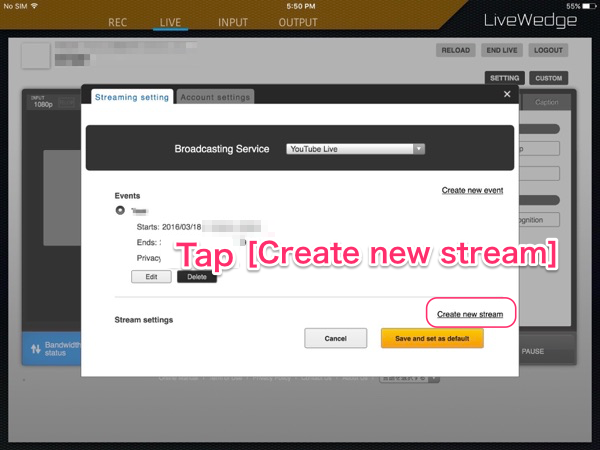
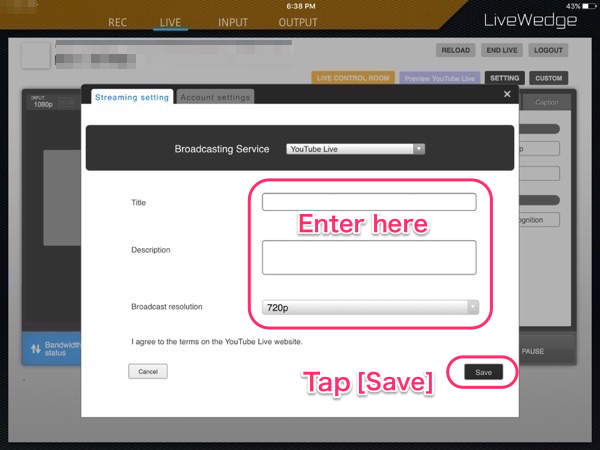
- Tap [Create new stream], set the broadcasting resolution.We recommend to use 720p for LiveWedge.And tap [Save] to save setting.
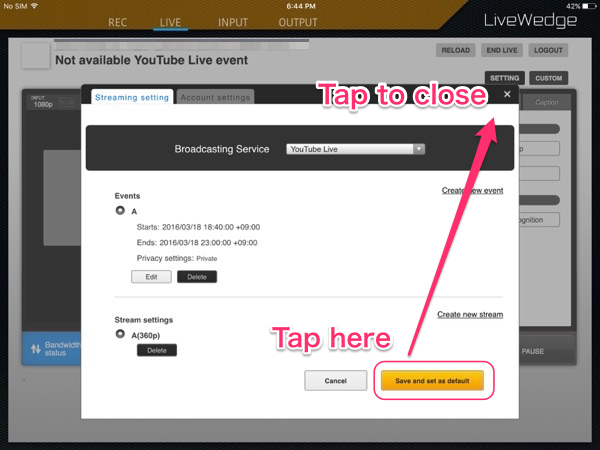
- Tap [Save and set as default] and close the settings window.
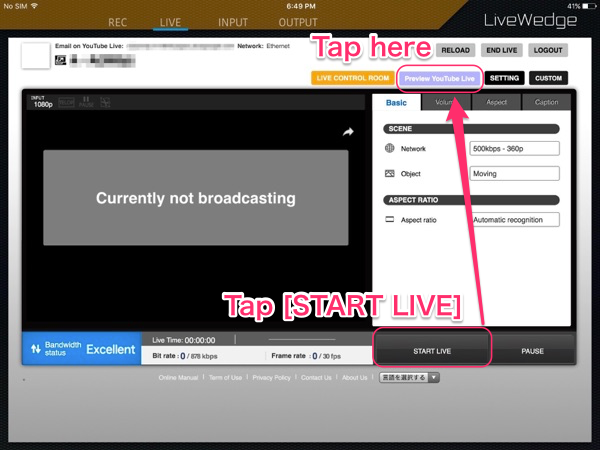
- Then you will see Dashboard main screen and [Preview YouTube Live] button. First, tap [START LIVE] on the bottom-right and then tap [preview YouTube Live].
- [Preview YouTube Live] will change to [Broadcast YouTube Live]. Click [Broadcast YouTube Live] to start live streaming.

- Note: When you click [Finish YouTube Live], the live stream will end and cannot restart. You will need to create another event to start live streaming again.
